

cilium의 service mesh에서는 traffic shifting 설정을 CiliumEnvoyConfig로 할 수 있다.
샘플 애플리케이션 배포하기
# traffic-shifting 이라는 넴스페이스를 생성해서 여기서 진행하겠습니다.
kubectl create ns traffic-shifting

kubectl config set-context --current --namespace traffic-shifting
먼저 helloworld의 백엔드로 2개의 deployment를 준비합니다. 이 deployment의 라벨은 version: v1과 v2가 서로 다르게 붙어있습니다.
cat << EOF | kubectl apply -f -
apiVersion: v1
kind: Service
metadata:
  name: helloworld
  labels:
    app: helloworld
    service: helloworld
spec:
  ports:
    - port: 5000
      name: http
  selector:
    app: helloworld
---
apiVersion: apps/v1
kind: Deployment
metadata:
  name: helloworld-v1
  labels:
    app: helloworld
    version: v1
spec:
  replicas: 1
  selector:
    matchLabels:
      app: helloworld
      version: v1
  template:
    metadata:
      labels:
        app: helloworld
        version: v1
    spec:
      containers:
        - name: helloworld
          image: docker.io/istio/examples-helloworld-v1
          resources:
            requests:
              cpu: "100m"
          imagePullPolicy: Always
          ports:
            - containerPort: 5000
---
apiVersion: apps/v1
kind: Deployment
metadata:
  name: helloworld-v2
  labels:
    app: helloworld
    version: v2
spec:
  replicas: 1
  selector:
    matchLabels:
      app: helloworld
      version: v2
  template:
    metadata:
      labels:
        app: helloworld
        version: v2
    spec:
      containers:
        - name: helloworld
          image: docker.io/istio/examples-helloworld-v2
          resources:
            requests:
              cpu: "100m"
          imagePullPolicy: Always
          ports:
            - containerPort: 5000
EOF
그리고 클라이언트 역할을 할 client-pod를 하나 구성합니다.
cat << EOF | kubectl apply -f -
apiVersion: v1
kind: Pod
metadata:
  name: curl-pod
  labels:
    app: curl
spec:
  containers:
  - name: curl
    image: nicolaka/netshoot
    command: ["tail"]
    args: ["-f", "/dev/null"]
  terminationGracePeriodSeconds: 0
EOF

기본 설정의 경우
아무런 설정이 안되어있는 경우 랜덤하게 호출이 되며 5:5 비율로 호출이 되게 됩니다.
for i in {1..100}; do kubectl exec -i curl-pod -- curl -s helloworld:5000/hello; done \
| tee /dev/stderr \
| awk '/version: v1/{v1++} /version: v2/{v2++} END{printf("v1=%d  v2=%d  total=%d\n", v1, v2, v1+v2)}'
100번을 호출했을때 50대 50으로 호출이 된것을 볼 수 있습니다.

트래픽 시프팅 해보기
CiliumEnvoyConfig를 사용하면 클라이언트에서는 동일하게 helloworld를 호출하지만 Envoy가 중간에 트래픽을 가로채서 helloworld-v1/-v2라는 ‘서비스에 매핑된 엔드포인트 집합’으로 가중치 분배를 수행해 직접 파드로 연결할 수 있습니다.
직접 실행해보면서 확인해보겠습니다. 먼저 helloworld의 각각의 버전을 호출할 수 있도록 서비스를 2개를 추가 생성합니다.
cat << EOF | kubectl apply -f -
apiVersion: v1
kind: Service
metadata:
  name: helloworld-v1
  labels:
    app: helloworld
    service: helloworld
    version: v1
spec:
  ports:
    - port: 5000
      name: http
  selector:
    app: helloworld
    version: v1
---
apiVersion: v1
kind: Service
metadata:
  name: helloworld-v2
  labels:
    app: helloworld
    service: helloworld
    version: v2
spec:
  ports:
    - port: 5000
      name: http
  selector:
    app: helloworld
    version: v2
EOF
이제 총 3개의 서비스가 생성되었습니다.

이제 helloworld를 호출하면 helloworld-v1혹은 v2가 호출 될 수 있도록 cilium envoy config를 설정합니다. 테스트하는 네임스페이스를 잘 살펴서 설정을 변경해 배포하시길 바랍니다.
cat << EOF | kubectl apply -f -
apiVersion: cilium.io/v2
kind: CiliumEnvoyConfig
metadata:
  name: envoy-lb-listener
spec:
  services:
    - name: helloworld
      namespace: traffic-shifting # 넴스페이스 수정
  backendServices:
    - name: helloworld-v1
      namespace: traffic-shifting # 넴스페이스 수정
    - name: helloworld-v2
      namespace: traffic-shifting # 넴스페이스 수정
  resources:
    - "@type": type.googleapis.com/envoy.config.listener.v3.Listener
      name: envoy-lb-listener
      filter_chains:
        - filters:
            - name: envoy.filters.network.http_connection_manager
              typed_config:
                "@type": type.googleapis.com/envoy.extensions.filters.network.http_connection_manager.v3.HttpConnectionManager
                stat_prefix: envoy-lb-listener
                rds:
                  route_config_name: lb_route
                http_filters:
                  - name: envoy.filters.http.router
                    typed_config:
                      "@type": type.googleapis.com/envoy.extensions.filters.http.router.v3.Router
    - "@type": type.googleapis.com/envoy.config.route.v3.RouteConfiguration
      name: lb_route
      virtual_hosts:
        - name: "lb_route"
          domains: [ "*" ]
          routes:
            - match:
                prefix: "/"
              route:
                weighted_clusters:
                  clusters:
                    - name: "traffic-shifting/helloworld-v1"  # 넴스페이스 수정
                      weight: 90
                    - name: "traffic-shifting/helloworld-v2"  # 넴스페이스 수정
                      weight: 10
                retry_policy:
                  retry_on: 5xx
                  num_retries: 3
                  per_try_timeout: 1s
    - "@type": type.googleapis.com/envoy.config.cluster.v3.Cluster
      name: "traffic-shifting/helloworld-v1"  # 넴스페이스 수정
      connect_timeout: 5s
      lb_policy: ROUND_ROBIN
      type: EDS
      outlier_detection:
        split_external_local_origin_errors: true
        consecutive_local_origin_failure: 2
    - "@type": type.googleapis.com/envoy.config.cluster.v3.Cluster
      name: "traffic-shifting/helloworld-v2"  # 넴스페이스 수정
      connect_timeout: 3s
      lb_policy: ROUND_ROBIN
      type: EDS
      outlier_detection:
        split_external_local_origin_errors: true
        consecutive_local_origin_failure: 2
EOF
이상태에서 아까와 동일하게 helloworld를 호출해보겠습니다.
for i in {1..100}; do kubectl exec -i curl-pod -- curl -s helloworld:5000/hello; done \
| tee /dev/stderr \
| awk '/version: v1/{v1++} /version: v2/{v2++} END{printf("v1=%d  v2=%d  total=%d\n", v1, v2, v1+v2)}'
이제는 아까와는 다르게 9대 1로 설정이 변경된 것을 알 수 있습니다.

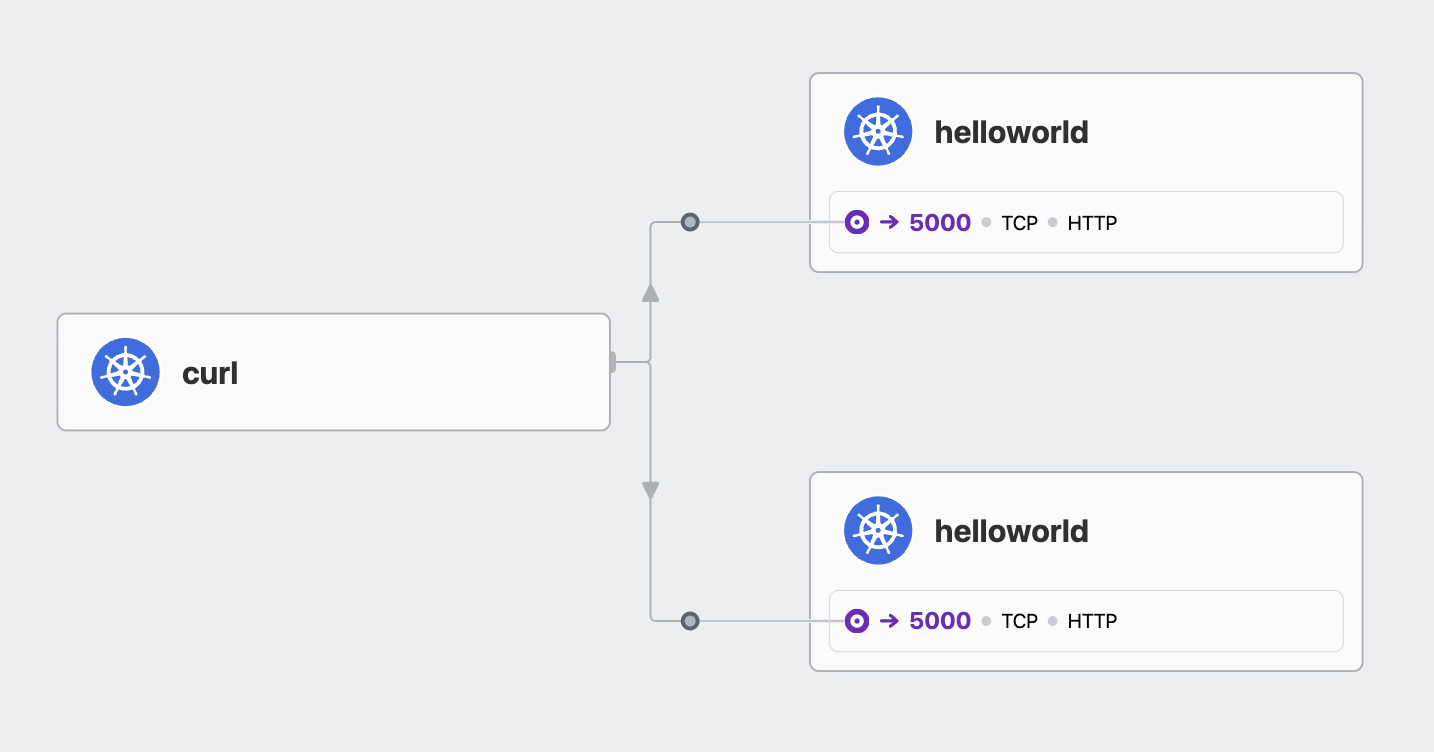
hubble에서는 기본으로 보았을 때에는 helloworld로 가는 것 처럼 보이고
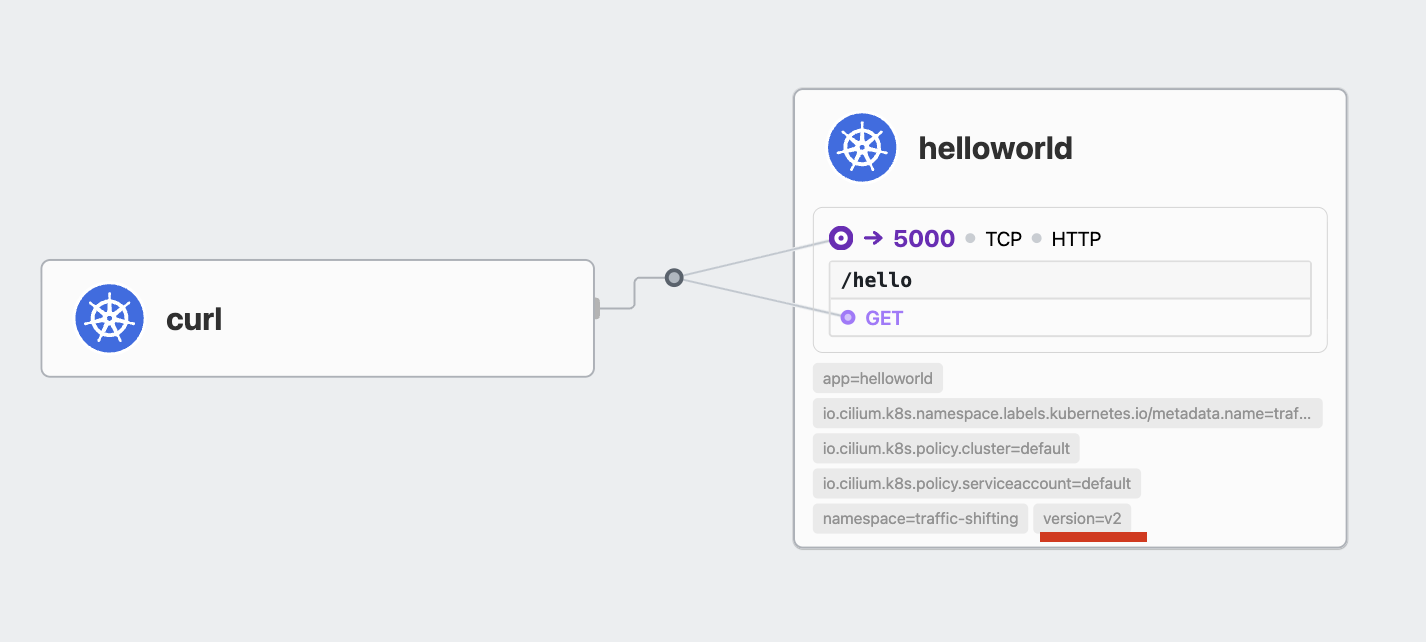
helloworld를 클릭했을 때 버전 정보는 나오지만 CiliumEnvoyConfig로 인해 트래픽의 가중치가 변경되었는지는 알기 어렵습니다.
'K8S > 🔥 network study🔥' 카테고리의 다른 글
| [cilium] gateway API로 트래픽 분할하기 (0) | 2025.08.22 |
|---|---|
| [cilium] TProxy 이해해보기 (0) | 2025.08.22 |
| [cilium] Service Mesh 구성하기 (shared 모드) (0) | 2025.08.22 |
| [cilium] containerlab으로 lb ippool 테스트 해보기 (6) | 2025.08.17 |
| [cilium] cluster mesh 테스트 (0) | 2025.08.17 |