

cilium에서는 gateway API를 지원하고 있기 때문에 트래픽 분할을 할 수 있습니다. 이번에는 Gateway API를 구성하고 가중치에 따라 트래픽을 분할해보겠습니다.
cilium 설치하기
cilium을 설치하기 전 먼저 gateway api의 crd들을 설치해줍니다.
kubectl apply -f https://raw.githubusercontent.com/kubernetes-sigs/gateway-api/v1.2.0/config/crd/standard/gateway.networking.k8s.io_gatewayclasses.yaml
kubectl apply -f https://raw.githubusercontent.com/kubernetes-sigs/gateway-api/v1.2.0/config/crd/standard/gateway.networking.k8s.io_gateways.yaml
kubectl apply -f https://raw.githubusercontent.com/kubernetes-sigs/gateway-api/v1.2.0/config/crd/standard/gateway.networking.k8s.io_httproutes.yaml
kubectl apply -f https://raw.githubusercontent.com/kubernetes-sigs/gateway-api/v1.2.0/config/crd/standard/gateway.networking.k8s.io_referencegrants.yaml
kubectl apply -f https://raw.githubusercontent.com/kubernetes-sigs/gateway-api/v1.2.0/config/crd/standard/gateway.networking.k8s.io_grpcroutes.yaml
이제 cilium을 설치합니다. 버전은 1.18.1 버전을 사용했습니다. gatewayAPI.enabled가 true여야 합니다.
helm install cilium cilium/cilium --namespace kube-system \
  --set k8sServiceHost=auto --set ipam.mode="cluster-pool" \
  --set k8s.requireIPv4PodCIDR=true --set ipv4NativeRoutingCIDR=10.244.0.0/16 \
  --set routingMode=native --set autoDirectNodeRoutes=true --set endpointRoutes.enabled=true \
  --set kubeProxyReplacement=true --set bpf.masquerade=true --set installNoConntrackIptablesRules=true \
  --set endpointHealthChecking.enabled=false --set healthChecking=false \
  --set hubble.enabled=true --set hubble.relay.enabled=true --set hubble.ui.enabled=true \
  --set hubble.ui.service.type=NodePort --set hubble.ui.service.nodePort=30003 \
  --set prometheus.enabled=true --set operator.prometheus.enabled=true --set hubble.metrics.enableOpenMetrics=true \
  --set hubble.metrics.enabled="{dns,drop,tcp,flow,port-distribution,icmp,httpV2:exemplars=true;labelsContext=source_ip\,source_namespace\,source_workload\,destination_ip\,destination_namespace\,destination_workload\,traffic_direction}" \
  --set localRedirectPolicy=true --set l2announcements.enabled=true \
  --set gatewayAPI.enabled=true \
  --set operator.replicas=1 --set debug.enabled=true
정상적으로 설치된 경우 다음과 같이 gateway class를 확인할 수 있습니다.
kubectl get gatewayclasses
ACCEPTED가 true가 되어야합니다.

그리고 추가로 이 gateway에 붙일 LB IP도 추가해 줍니다.
cat << EOF | kubectl apply -f -
apiVersion: "cilium.io/v2"
kind: CiliumLoadBalancerIPPool
metadata:
  name: "cilium-lb-ippool"
spec:
  blocks:
  - start: "172.17.0.211"
    stop:  "172.17.0.215"
---
# L2 Announcement 정책 설정
apiVersion: "cilium.io/v2alpha1"
kind: CiliumL2AnnouncementPolicy
metadata:
  name: policy1
spec:
  interfaces:
  - eth0
  externalIPs: true
  loadBalancerIPs: true
EOF
샘플 애플리케이션 배포하기
테스트는 traffic-splitting 넴스페이스에서 진행하겠습니다.
kubectl create ns traffic-splitting
kubectl config set-context --current --namespace traffic-splitting
이제 cilium이 정상적으로 설치 되었으니 노드, 파드 정보를 확인할 수 있는 echo 서버를 2개 배포합니다.
cat << EOF | kubectl apply -f -
apiVersion: v1
kind: Service
metadata:
  labels:
    app: echo-1
  name: echo-1
spec:
  ports:
  - port: 8080
    name: high
    protocol: TCP
    targetPort: 8080
  selector:
    app: echo-1
---
apiVersion: apps/v1
kind: Deployment
metadata:
  labels:
    app: echo-1
  name: echo-1
spec:
  replicas: 1
  selector:
    matchLabels:
      app: echo-1
  template:
    metadata:
      labels:
        app: echo-1
    spec:
      containers:
      - image: ealen/echo-server:0.9.2
        name: echo-1
        ports:
        - containerPort: 8080
        env:
          - name: PORT
            value: "8080"
          - name: NODE_NAME
            valueFrom:
              fieldRef:
                fieldPath: spec.nodeName
          - name: POD_NAME
            valueFrom:
              fieldRef:
                fieldPath: metadata.name
          - name: POD_NAMESPACE
            valueFrom:
              fieldRef:
                fieldPath: metadata.namespace
          - name: POD_IP
            valueFrom:
              fieldRef:
                fieldPath: status.podIP
---
apiVersion: v1
kind: Service
metadata:
  labels:
    app: echo-2
  name: echo-2
spec:
  ports:
  - port: 8090
    name: high
    protocol: TCP
    targetPort: 8080
  selector:
    app: echo-2
---
apiVersion: apps/v1
kind: Deployment
metadata:
  labels:
    app: echo-2
  name: echo-2
spec:
  replicas: 1
  selector:
    matchLabels:
      app: echo-2
  template:
    metadata:
      labels:
        app: echo-2
    spec:
      containers:
      - image: ealen/echo-server:0.9.2
        name: echo-2
        ports:
        - containerPort: 8080
        env:
          - name: PORT
            value: "8080"
          - name: NODE_NAME
            valueFrom:
              fieldRef:
                fieldPath: spec.nodeName
          - name: POD_NAME
            valueFrom:
              fieldRef:
                fieldPath: metadata.name
          - name: POD_NAMESPACE
            valueFrom:
              fieldRef:
                fieldPath: metadata.namespace
          - name: POD_IP
            valueFrom:
              fieldRef:
                fieldPath: status.podIP
EOF
이 샘플 애플리케이션을 호출할 클라이언트 파드도 하나 생성합니다.
cat << EOF | kubectl apply -f -
apiVersion: v1
kind: Pod
metadata:
  name: curl-pod
  labels:
    app: curl
spec:
  containers:
  - name: curl
    image: nicolaka/netshoot
    command: ["tail"]
    args: ["-f", "/dev/null"]
  terminationGracePeriodSeconds: 0
EOF
cilium gateway 및 라우팅 구성하기
cilium의 gateway class를 사용하여 gateway를 하나 생성합니다.
cat << EOF | kubectl apply -f -
apiVersion: gateway.networking.k8s.io/v1
kind: Gateway
metadata:
  name: cilium-gw
spec:
  gatewayClassName: cilium # 위에서 추가된 gateway class
  listeners:
  - protocol: HTTP
    port: 80
    name: web-gw-echo
    allowedRoutes:
      namespaces:
        from: Same # 이 Gateway와 같은 네임스페이스로부터 Route만 허용
EOF
이렇게 설정해주면 위에서 설정한 LB IP가 붙은 gateway가 보이게 됩니다.
kubectl get gateway
이상태에서 파드나 서비스도 조회해 보겠습니다.
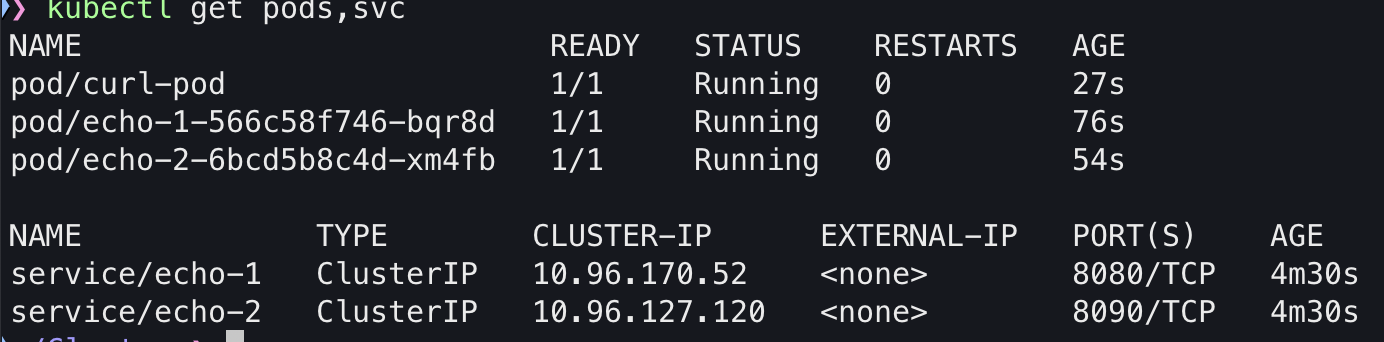
kubectl get pods,svc
조회 결과 파드는 생성되지 않았지만 LB로 서비스가 생성된 것을 알 수 있습니다.

이제 라우팅도 추가해서 구성해보겠습니다.
cat << EOF | kubectl apply -f -
apiVersion: gateway.networking.k8s.io/v1
kind: HTTPRoute
metadata:
  name: example-route-1
spec:
  parentRefs:
  - name: cilium-gw
  rules:
  - matches:
    - path:
        type: PathPrefix
        value: /echo # /echo로 트래픽이 들어오는 경우
    backendRefs:   # 아래의 백엔드로
    - kind: Service
      name: echo-1
      port: 8080
      weight: 50  # 가중치 50:50으로 트래픽을 보내라
    - kind: Service
      name: echo-2
      port: 8090
      weight: 50
EOF
호출해보기
아래와 같이 100번 호출해보면 약 50대 50으로 번갈아 호출하는 것을 확인할 수 있습니다.
GATEWAY=$(kubectl get gateway cilium-gw -o jsonpath='{.status.addresses[0].value}')
for i in {1..100}; do kubectl exec -i curl-pod -- curl -s http://$GATEWAY/echo | jq '.environment.HOSTNAME' -r; done \
| tee /dev/stderr \
| awk '/echo-1-/{v1++} /echo-2/{v2++} END{printf("v1=%d  v2=%d  total=%d\n", v1, v2, v1+v2)}'

가중치 변경하기
이번엔 9:1로 가중치를 변경해보겠습니다.
kubectl patch httproute example-route-1 --type='json' -p='[
  {
    "op":"replace",
    "path":"/spec/rules/0/backendRefs",
    "value":[
      {"kind":"Service","name":"echo-1","port":8080,"weight":99},
      {"kind":"Service","name":"echo-2","port":8090,"weight":1}
    ]
  }
]'
호출해보기
이제 변경된 가중치로 다시한번 호출해보겠습니다.
GATEWAY=$(kubectl get gateway cilium-gw -o jsonpath='{.status.addresses[0].value}')
for i in {1..100}; do kubectl exec -i curl-pod -- curl -s http://$GATEWAY/echo | jq '.environment.HOSTNAME' -r; done \
| tee /dev/stderr \
| awk '/echo-1-/{v1++} /echo-2/{v2++} END{printf("v1=%d  v2=%d  total=%d\n", v1, v2, v1+v2)}'
100번을 호출했을 때 99대 1의 비율로 변경되어 호출되는것을 확인할 수 있습니다.

hubble에서 확인시다음과 같이 ingress에서 echo-1과 echo2로 분산되어 트래픽이 보내지는 것을 확인할 수 있습니다.

외부 컨테이너에서 호출해보기
컨테이너를 생성합니다.
docker run -d --rm --name client --cap-add=NET_ADMIN --network kind nicolaka/netshoot tail -f /dev/null
이 컨테이너의 아이피는
docker inspect client | jq '.[0].NetworkSettings.Networks.kind.IPAddress' -r

172.17.0.6이고 응답의 결과를 확인했을 때에도 172.17.0.6으로 잘 설정되는 것을 확인할 수 있습니다.

'K8S > 🔥 network study🔥' 카테고리의 다른 글
| kube-burner로 쿠버네티스 성능테스트 해보기 (3) | 2025.08.29 |
|---|---|
| [cilium] Mutual Authentication 테스트 해보기 (진행 중) (1) | 2025.08.22 |
| [cilium] TProxy 이해해보기 (0) | 2025.08.22 |
| [cilium] L7 Traffic Shifting 테스트 (4) | 2025.08.22 |
| [cilium] Service Mesh 구성하기 (shared 모드) (0) | 2025.08.22 |