


hubble이 cilium이 설치된 쿠버네티스 클러스터의 트래픽 흐름을 확인시켜주지만 이 데이터를 장기적으로 저장하지는 않습니다.
hubble은 기본적으로 cilium 에이전트에서 발생하는 이벤트를 메모리에 저장합니다.
버퍼 사이즈를 기준으로 이벤트를 저장하고 기본적으로는 4095개의 이벤트만을 저장하고 있습니다. 링버퍼 구조상 1칸을 비워둡니다.
helm 차트 여기서 설정 변경 가능합니다.
hubble:
  # -- Enable Hubble (true by default).
  enabled: true
  # -- Annotations to be added to all top-level hubble objects (resources under templates/hubble)
  annotations: {}
  # -- Buffer size of the channel Hubble uses to receive monitor events. If this
  # value is not set, the queue size is set to the default monitor queue size.
  # eventQueueSize: ""

  # -- Number of recent flows for Hubble to cache. Defaults to 4095.
  # Possible values are:
  #   1, 3, 7, 15, 31, 63, 127, 255, 511, 1023,
  #   2047, 4095, 8191, 16383, 32767, 65535
  # eventBufferCapacity: "4095"
  # ⬆️ 여기서 변경 가능
그렇기 때문에 오래된 데이터에 대해서는 확인이 불가능합니다.
그렇지만 hubble exporter를 사용하여 로그를 파일로 남길 수 있습니다.
추가로 필터링이나 필드 마스킹의 기능도 사용할 수 있습니다.
static exporter 설정하기
먼저 static exporter를 설정하기 위해서는 hubble이 켜져있어야 합니다.
그리고 static export를 활성화 해주고 어떤 파일에 로그를 저장할지 지정합니다.
helm install cilium cilium/cilium --version 1.17.6 \
  --set hubble.enabled=true \
  --set hubble.export.static.enabled=true \
  --set hubble.export.static.filePath=/var/run/cilium/hubble/events.log
기본적으로는 파일 로테이션 크기는 10MB에 5개의 파일을 남기도록 설정됩니다.
필터 설정하기
특정 경우에만 데이터를 쌓거나 데이터를 쌓지 못하게 할수 도 있습니다. 룰 설정은 hubble cli를 통해 진행합니다.
DROPPED되거나 ERROR가 발생한 경우에만 파일을 쌓게 하고자 하면 다음과 같이 필터를 확인하고 추가합니다.

아래의 명령어로 hubble export 설정을변경해보겠습니다. 변경후에는 cilium 파드를 재시작 시켜줘야 합니다.
kubectl -n kube-system patch cm cilium-config --patch-file=/dev/stdin <<-EOF
data:
  hubble-export-allowlist: '{"verdict":["DROPPED","ERROR"]}'
EOF
재시작 후에는 아래와 같이 DROPPED된 패킷에 대해 로그가 남는것을 확인할 수 있습니다.

로그를 파일로 쌓는 것 뿐만 아니라 stdout으로도 출력이 가능합니다.
하지만 stdout으로 설정하게 되면 다른 cilium 로그들과 혼합되어서 로그가 보이게 됩니다.

dynamic exporter 설정하기
static 설정이 cilium을 재시작 해주어야 하고, 1개의 필터와 1개의 파일에만 데이터를 쌓을 수 있다면 dynamic export은 cilium 재시작 없이 필터를 여러개 구성할 수 있고 각각을 다른 파일에 저장할수 있습니다.
static exporter 설정은 끄고 dynamic exporter 설정을 켜보도록 하겠습니다. 우선 아무런 설정 없이 추가해보겠습니다.
아래의 명령어를 입력하면 파드가 재시작 됩니다.
helm upgrade cilium cilium/cilium --reuse-values -n kube-system \
   --set hubble.export.static.enabled=false \
   --set hubble.export.dynamic.enabled=true
설정 되면 cilium-flow-config 파일안에 dynamic 설정을 추가하면 됩니다. 기본 설정은 아래와 같이 들어가게 됩니다.
apiVersion: v1
kind: ConfigMap
metadata:
  annotations:
    meta.helm.sh/release-name: cilium
    meta.helm.sh/release-namespace: kube-system
  labels:
    app.kubernetes.io/managed-by: Helm
  name: cilium-flowlog-config
  namespace: kube-system
data:
  flowlogs.yaml: |
    flowLogs:
    - excludeFilters: []
      fieldMask: []
      filePath: /var/run/cilium/hubble/events.log
      includeFilters: []
      name: all
이 설정을 다음과 같이 변경해서 적용해보겠습니다. 변경된 파일은 cilium-agent내부의 /flowlog-config/flowlogs.yaml 여기에 저장되게 됩니다.
apiVersion: v1
kind: ConfigMap
metadata:
  annotations:
    meta.helm.sh/release-name: cilium
    meta.helm.sh/release-namespace: kube-system
  labels:
    app.kubernetes.io/managed-by: Helm
  name: cilium-flowlog-config
  namespace: kube-system
data:
  flowlogs.yaml: |
    flowLogs:
    - excludeFilters: []
      fieldMask: []
      filePath: /var/run/cilium/hubble/starwards.log
      includeFilters:
      - source_pod:
        - "default/"
      - destination_pod:
        - "default/"
      name: starwards
잘 적용되면 cilium-agent로그에 이런식으로 로그가 보이게 됩니다.

그리고 아래와 같이 파일이 생기게 됩니다.

static 설정과 다르게 end 설정이 가능하여 일부 시간동안만 로그를 수집하는 것도 가능합니다.
end 설정을 추가해보겠습니다.
apiVersion: v1
kind: ConfigMap
metadata:
  annotations:
    meta.helm.sh/release-name: cilium
    meta.helm.sh/release-namespace: kube-system
  labels:
    app.kubernetes.io/managed-by: Helm
  name: cilium-flowlog-config
  namespace: kube-system
data:
  flowlogs.yaml: |
    flowLogs:
    - excludeFilters: []
      fieldMask: []
      filePath: /var/run/cilium/hubble/starwards-end.log
      includeFilters:
      - source_pod:
        - "default/"
      - destination_pod:
        - "default/"
      name: starwards
      end: "2025-07-26T14:35:00+00:00"
이러고 10초에 한번씩 호출 해보겠습니다.
watch -n 10 "kubectl exec tiefighter -- curl -s -XPUT deathstar.default.svc.cluster.local/v1/exhaust-port"
3개의 cilium 파드 (control plane 제외, 로그가 쌓이 지 않음)을 보면 35분이 지난 뒤로는 로그가 쌓이지 않는 것을 볼 수 있습니다.

테스트 용도로 특정 시간까지의 데이터를 수집하고자 할때 사용할 수 있을 것 같습니다.
grafana에서 flow 로그 확인하기
옛날에는 hubble 데이터 소스 플러그인이 있어 엔터 프라이즈 버전 이상의 grafana에 연결할 수 있었던 것 같습니다. (현재는 지원 불가)
이번에는 promtail과 loki를 사용해서 수집해보겠습니다.
grafana 설치하기
cilium 공식에서 제공하는 grafana와 prometheus 설치 방법입니다.
kubectl apply -f https://raw.githubusercontent.com/cilium/cilium/1.17.6/examples/kubernetes/addons/prometheus/monitoring-example.yaml
namespace/cilium-monitoring created
loki 설치하기
* auth_enabled를 비활성화 합니다
loki:
  auth_enabled: false
  commonConfig:
    replication_factor: 3
  schemaConfig:
    configs:
      - from: "2024-04-01"
        store: tsdb
        object_store: s3
        schema: v13
        index:
          prefix: loki_index_
          period: 24h
  pattern_ingester:
      enabled: true
  limits_config:
    allow_structured_metadata: true
    volume_enabled: true
  ruler:
    enable_api: true

minio:
  enabled: true

deploymentMode: SingleBinary

singleBinary:
  replicas: 3

# Zero out replica counts of other deployment modes
backend:
  replicas: 0
read:
  replicas: 0
write:
  replicas: 0

ingester:
  replicas: 0
querier:
  replicas: 0
queryFrontend:
  replicas: 0
queryScheduler:
  replicas: 0
distributor:
  replicas: 0
compactor:
  replicas: 0
indexGateway:
  replicas: 0
bloomCompactor:
  replicas: 0
bloomGateway:
  replicas: 0
위의 값을 이용해서 설치합니다.
helm install --values values.yaml loki grafana/loki -n cilium-monitoring
promtail 설치하기
clients:
  - url: http://loki-gateway/loki/api/v1/push

extraVolumes:
  - name: hubble
    hostPath:
      path: /var/run/cilium/hubble

extraVolumeMounts:
  - name: hubble
    mountPath: /var/run/cilium/hubble
    readOnly: true

config:
  snippets:
    extraScrapeConfigs: |
      - job_name: hubble
        static_configs:
          - targets:
              - localhost
            labels:
              job: hubble
              __path__: /var/run/cilium/hubble/starwards.log
              namespace: kube-system
helm차트로 이 설정도 추가합니다.
helm install promtail grafana/promtail -n cilium-monitoring --values values.yaml
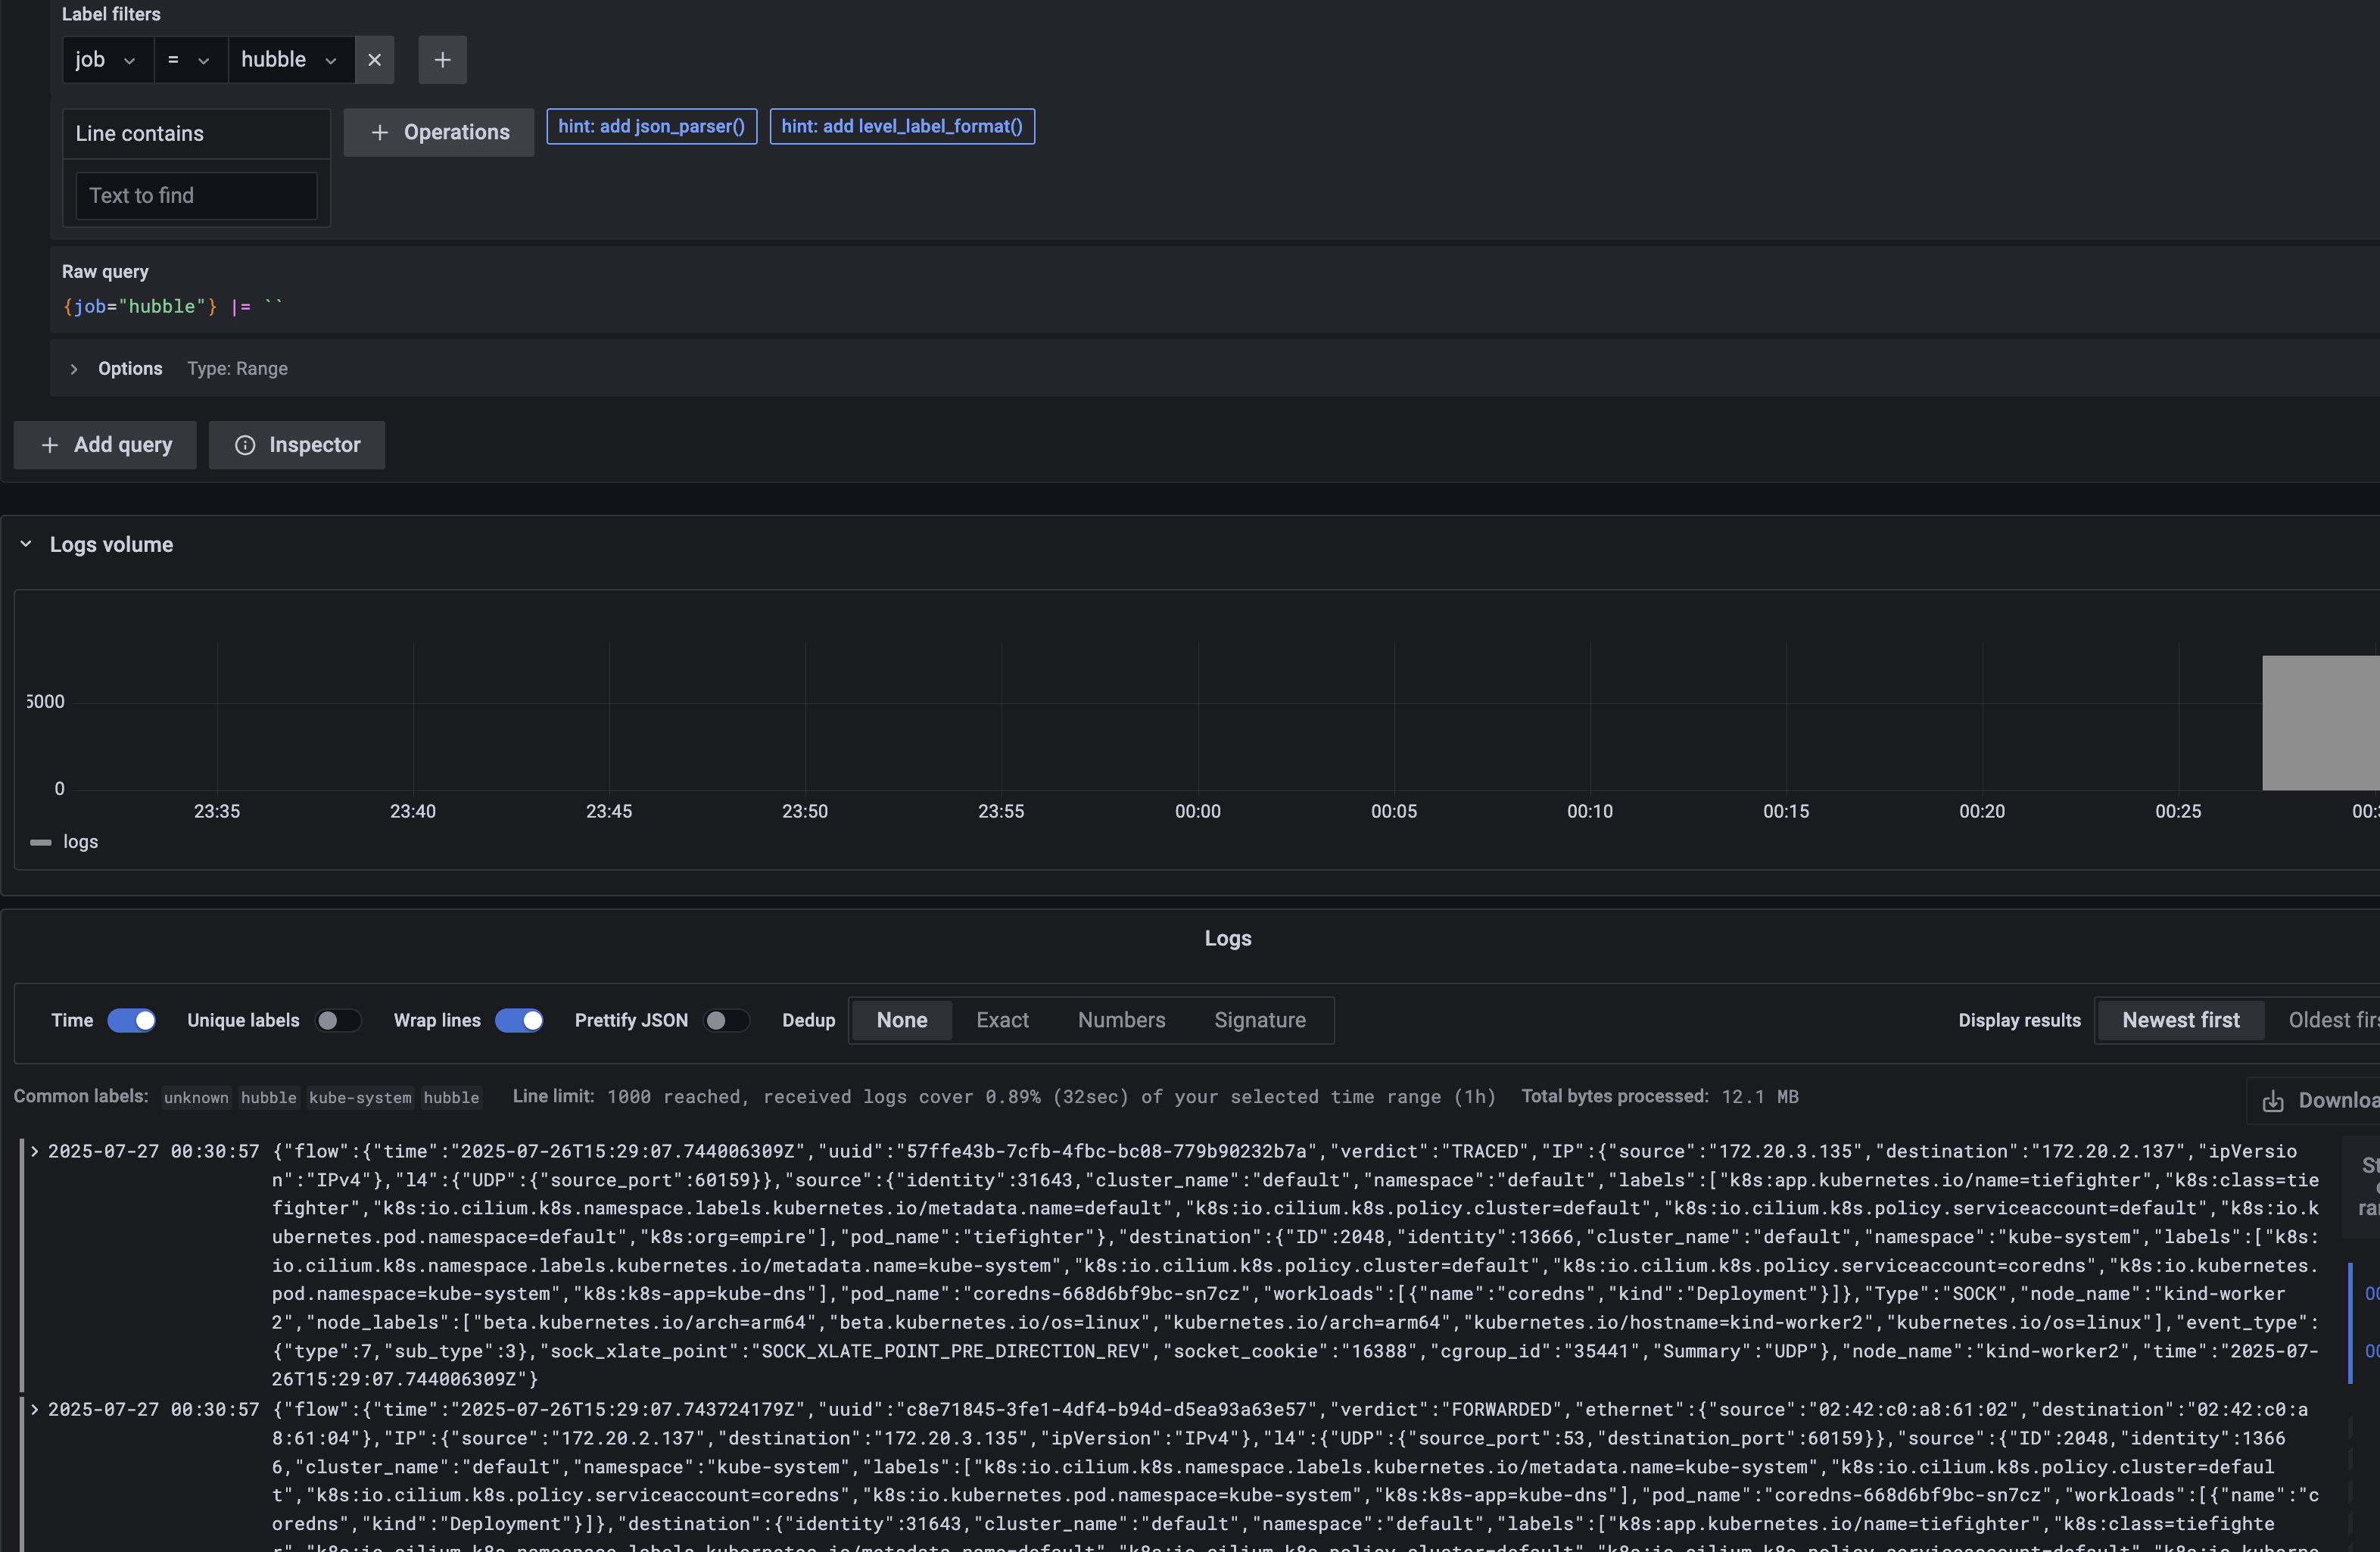
로그 확인해보기
grafana에 연동해서 봤을 때 hubble로그들이 잘 보이는 것을 볼 수 있습니다.
'K8S > 🔥 network study🔥' 카테고리의 다른 글
| Cilium Masquerading (BPF-based vs iptables-based) (3) | 2025.08.02 |
|---|---|
| [cilium] native routing 통신 흐름 확인해보기 (0) | 2025.07.31 |
| [cilium] 스타워즈 데모로 cilium 테스트 해보기 (3) | 2025.07.26 |
| [cilium] hubble 사용해보기 (0) | 2025.07.22 |
| [cilium] flannel에서 cilium으로 마이그레이션 해보기 (1) | 2025.07.18 |